
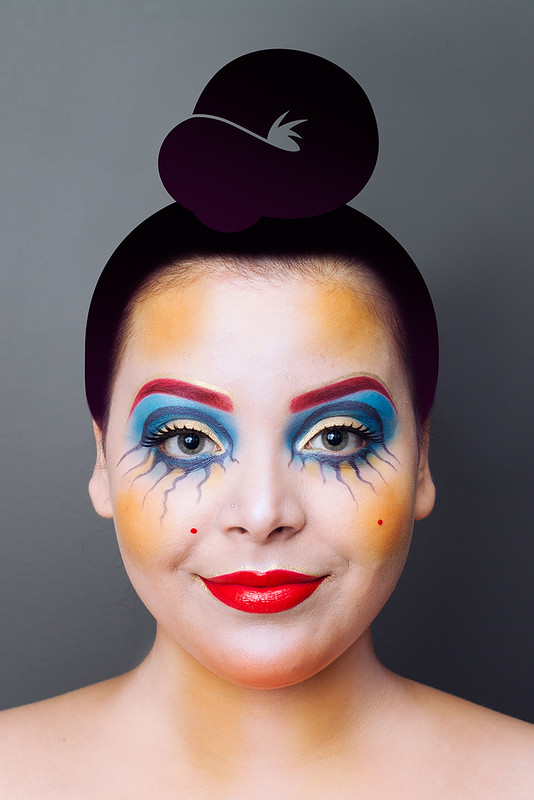
Illamasqua is one brand I have super limited experience with. In fact, I only own two of their lipsticks but I'm dying to try out more. For this look, I'm wearing Rimmel Show Off Lip Lacquer in Big Bang, with gold eyeshadow pigment (Gold Finger) along the outside of my upper lip and outer edges of my bottom lip.
Products Used:
NYX Eyeshadow Base in White
Maybelline Color Tattoo in Tenacious Teal
ULTA Eyeshadow in Mosaic and Chianti
Random Blue Eyeshadow??
MAC Eyeshadow in Chrome Yellow and Orange
EMANI Crushed Minerals Color Dust in Gold Finger
Prestige Beauty Bar Eyeshadow Palette in Artsy Tartsy
NYX Lipliner Pencil in Plush Red
Covergirl Clump Crusher Mascara
Ardell Special Occasion Collection in Sublime

Before you even get to the eyes, apply white face paint, or in my case, the lightest foundation available at Walgreens. Set with translucent powder, and highlight nose, cupid's bow, forehead, etc. with iridescent white pigment. Mix yellow and orange eyeshadow to create mustard and apply to cheeks, temples, chin, and hollows of neck. Add a touch of blush to your chin, too!
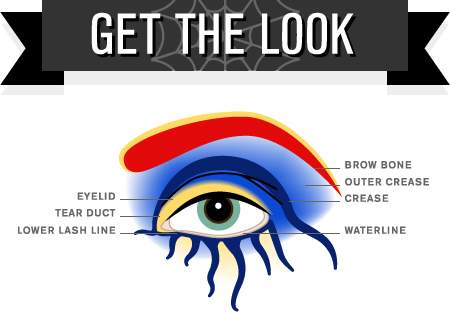
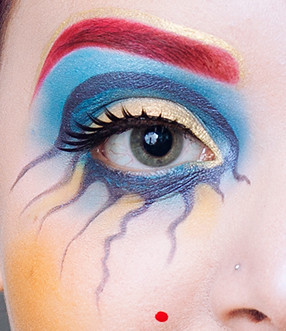
Step 2: Set eyebrows with red eyeshadow (Chianti).
Step 3: Pat blue base (Tenacious Teal) over entire eye area, omitting eyelid.
Step 4: Apply blue over entire eye area with a fluffy brush, omitting inner eyelid.
Step 5: Apply blue to lower lash line with a pencil brush.
Step 6: Apply gold (Gold Finger) onto eyelid with an eyeshadow brush.
Step 7: Apply dark blue wet to create a false crease using a detailing brush.
Step 8: Bring dark blue down and around tear duct, and line lower lash line.
Step 9: Create squiggly lines extending from lower lash line using dark blue wet.
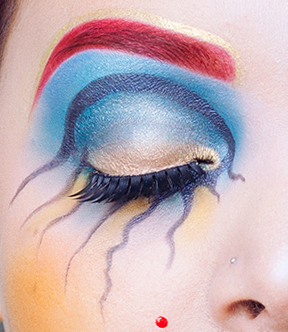
Step 10: Wipe away every other gap (2nd, 4th, 6th) using a makeup remover + q-tip.
Step 11: Fill in gaps (2nd, 4th, 6th) with yellow (Chrome Yellow).
Step 12: Apply light blue (Mosaic) as highlight to brow bone.
Step 13: Apply gold (Gold Finger) above eyebrow using a detailing brush.
Step 14: Apply gold (Gold Finger) to tear duct.
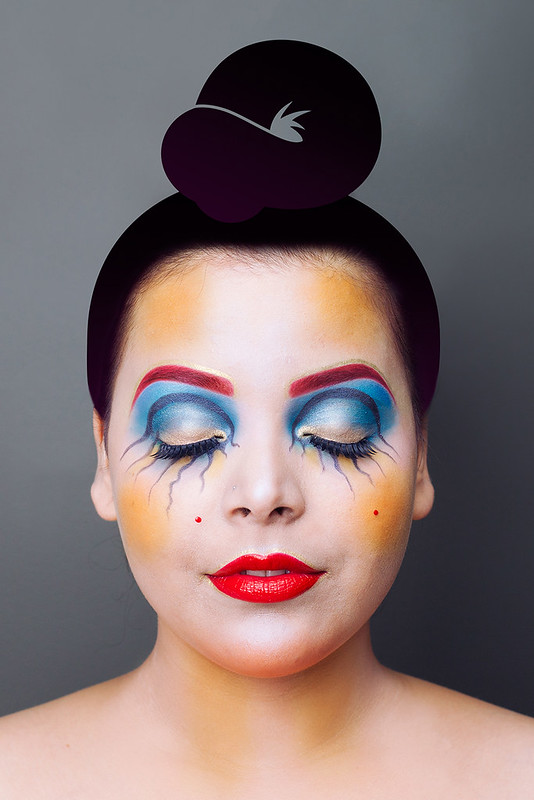
Step 15: Apply false lashes!
I hope you enjoyed this Illamasquaesque look! It was so much fun to do, even though those Ardell lashes were a total pain to apply (they're so stiff). Let me know what awesome things you're doing today, and what you're dressing as! Happy Halloween!

this looks like a "wicked snow white" which could be a pretty badass costume
ReplyDeleteOh, totally! The original model was blonde with pin curls so I doubt that was the intention but it fits!
DeleteUgh. This is perfect! I like this version better than the original, just sayin'.
ReplyDeleteAh, no way! You're the sweetest! I just wish I could do my makeup like this everyday, you know?
DeleteI totally do. I feel the same way! I love super "out there" looks. Let's start a colony where rad babes wear avant garde makeup looks all the time!
DeleteOh man, I am SO there! Endless avant-garde makeup and endless free clothes. It would be a fat babe paradise.
DeleteYou are amazing! I don't wear much make up, but I love these posts.
ReplyDeleteThanks, Melissa! You know, I'm usually bare-faced throughout the week but Halloween was a great excuse to experiment. I'm glad you appreciate these posts! I love doing them.
DeleteThis looks amazing!!! Great job!
ReplyDeleteThank you! It was so much fun, too! :)
Deletewow amazing! love it! :)
ReplyDeleteThanks, girl! I appreciate it! :)
Delete