12.31.2013

2013 Hippopotamuslee Highlights

I've never written a year-end highlights post but I figured maybe a little reflection was in order while enjoying breakfast for dinner. After all, I did post more this year than any other. My topics may seem to jump around quite a bit, but they always fall into one of six categories. Here are my favorite posts in each:

Beauty

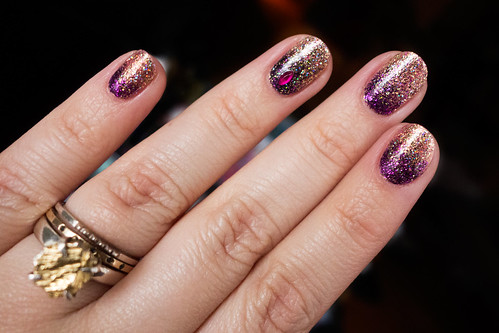
NOTW: Uneven Lengths + Simple How-To

Glitter Gradient Nail Art Tutorial


DIY & Crafts

WIP: Round One

Crochet Quilt Hexagons


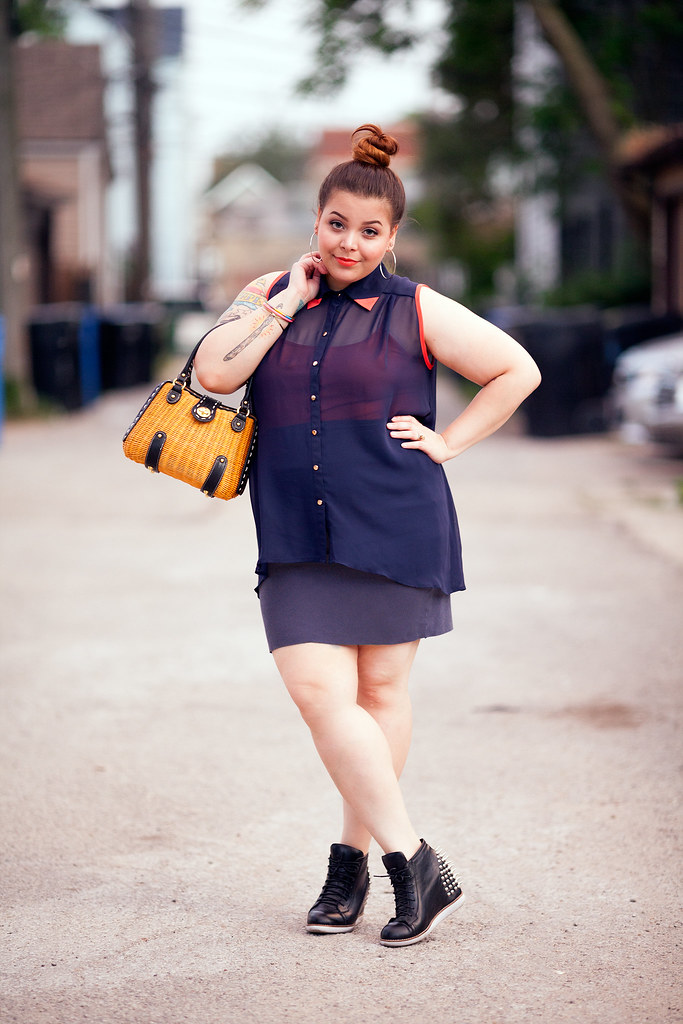
Fatshion

Beyoncé, Beyoncé, Beyoncé!

Fatshion OOTD


Food: Savory

Comida Venezolana

Venezuelan Arepas Aprea de Dominó con Aguacate


Food: Sweet

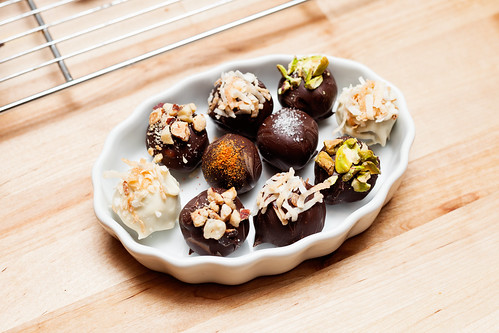
Homemade Confectionery

Homemade Confectionery Chocolate Truffles


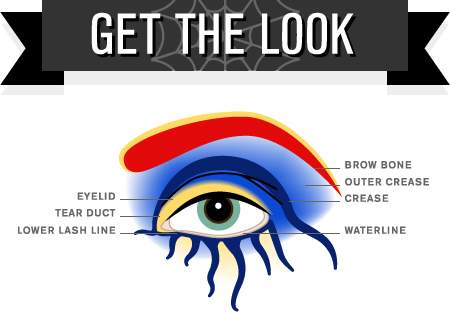
Get the Look

A Romantic Look with LORAC's GLOgetter Palette

Makeup Tutorial for a romantic look LORAC GLOgetter


etc...

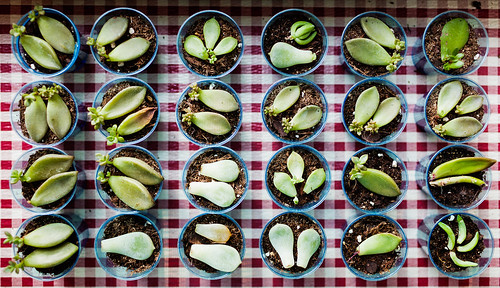
THEY LIVE!

Propagating leaf cuttings succulents

Aside from last week's Beyoncé inspired Get the Look post (super close runner-up to my fave!), I took a monthlong vacation from blogging. I can't say that was at all planned but it looks like it's becoming a yearly tradition for me. Something about the holidays rushing in makes me stall a bit and before I know it it's New Year's Eve! Next year I'll do better, I promise. Happy New Year!

12.23.2013

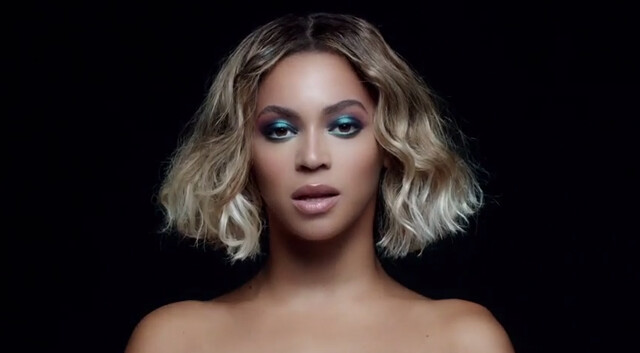
Get the Look from Beyoncé's "Mine" ft Drake

Maybe—just maybe if you live under a rock, you don't know that Beyoncé released a surprise, self-titled, visual album at midnight on Friday the 13th. I was up, I freaked out, I downloaded it, I cried, and now here we are.

Her makeup in each video is absolute perfection thanks to makeup artist, Sir John B. I tweeted about my desire to recreate all of her looks and you guys encouraged me! So here's my take on the beautiful teal look from Beyoncé "Mine" (featuring Drake):


BEYONCÉ "MINE" (FEATURING DRAKE)

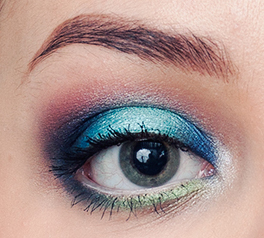
Beyoncé Mine ft Drake Makeup Tutorial - Eyes Open Beyoncé Mine ft Drake Makeup Tutorial - Eyes Closed
eye open eye closed

This look was so easy to achieve! I'm not usually one for blue eyeshadow (I'm always saying that) but I really love how this turned out. It can also be toned down if you use a lighter hand and/or omit the blue base. That's actually something I might try because I think I'm just at that too fair-skinned to pull it off mark. To off-set the intensity of the eyes, I used Revlon Shine Lipstick in Honey Bare, which is a touch too peach for me. One day I'll find a nude that works!

Beyoncé's eyebrows are always awesome and a bit tamed-but-untamed, if that makes sense. I tried to emulate this by using short, heavy-handed strokes of product then applying a super light coat of black mascara to my brow hair. e.l.f.'s 3-in-1 Mascara has the perfect wand for this.

Products Used:
Milani Eyeshadow Primer in 01 Nude
Maybelline Color Tattoo in Edgy Emerald
Wet n Wild Color Icon Palette in Blue Had Me At Hello
Red Earth Eyeshadow Single in GR098
Rimmel Soft Kohl Kajal Eye Liner Pencil in Pure White
Wet n Wild Color Icon Eyeliner Pencil in Turquoise
Jordana 12-HR Made To Last Liquid Eyeliner Pencil in Black Point
Covergirl Clump Crusher Mascara
e.l.f. 3-in-1 Mascara
e.l.f. Eyebrow Kit in Medium

Beyoncé Mine ft Drake Makeup Tutorial - Products Used

Beyoncé Mine ft Drake Makeup Tutorial

Step 1: Apply blue base (Edgy Emerald) over entire eyelid with finger.
Step 2: Apply mauve (not pictured—ugh!) to outer crease with blending brush.
Step 3: Pat navy blue (RC Crease) onto inner & outer eyelid with eyeshadow brush.
Step 4: Pat aqua/teal (RC Eyelid) onto center of eyelid with eyeshadow brush.
Step 5: Pat icy blue (RC Browbone) onto center of aqua/teal (RC Eyelid) with finger.
Step 6: Apply blue-black (LC Crease) to crease and blend with crease brush.
Step 7: Apply silver frost (LC Browbone) as highlight to tear duct with finger.
Step 8: Line lower lash line with turquoise eyeliner.
Step 9: Set inner 1/2 with green (GR098), outer 1/2 with navy blue (RC Crease).
Step 10: Tightline upper lash line with waterproof black eyeliner.
Step 11: Line waterline with white waterproof eyeliner.

LEFT COLUMN = LC, RIGHT COLUMN = RC of BLUE HAD ME AT HELLO

I used inexpensive, easy to find drugstore products to help encourage you to try Beyoncé's look from "Mine" for yourself. If you don't already own Wet n Wild's Blue Had Me At Hello, I suggest you go pick it up ASAP. It's being discontinued and it's on clearance at CVS right now! The eyeshadows are incredibly pigmented, too. Did you notice I went wingless in an attempt at authenticity? Aren't you proud??

11.25.2013

Profusion Holiday 2013 Palettes: Twinkle Twinkle & Angelic Eyes Review + Swatches

Phew! What a mouthful with that title, huh? I go through weird phases of being a total makeup snob wanting only to focus on my mid-range/higher end makeup, then obsessing over inexpensive drugstore makeup (read: every Wet n Wild new release).


One brand I'd always steered clear of was Profusion Cosmetics. I assumed the quality to be questionable because it's sold at Dollar Tree alongside L.A. Colors, which is like p-u-r-e chalk to me. Don't get me wrong, I absolutely LOVE Dollar Tree and always check out the beauty aisle, but I'd drawn the imaginary line at chalk.

The Profusion Holiday 2013 palettes I picked up at Walgreens after reading this post on Nouveau Cheap, however, are totally not like that. I was pleasantly surprised and thought I'd share swatches in case you'd like to pick them up before they're gone.

Profusion Twinkle Twinkle 5 Color Eyeshadow Palette 01 Twinkle Twinkle 5 Color Eyeshadow Palette in 01
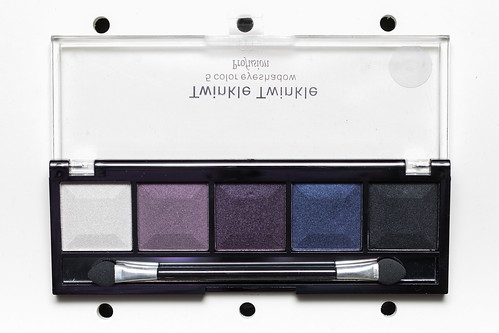
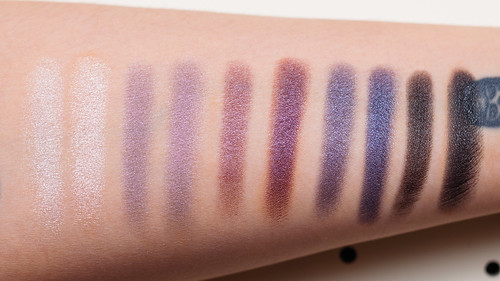
$1.00 | 8 grams
Available at Walgreens

Twinkle Twinkle 01 is a new all-shimmer, purple hued palette. The eyeshadows are quite opaque for $1 makeup, and primer helps bring out the colors even more. The texture is surprisingly soft to the touch without being flaky, dry, or chalky, which was my biggest fear (save for the white). The standout shade is the duochrome lilac-mauve. It's difficult to show the greenish-grey shifts in color but I promise they're there! The black is nicely pigmented but it stains, which may or may not be a bad thing depending on your preference.

Bottom Line: Definitely a must-have if you enjoy purple eyeshadow and have an extra dollar to spare! It's also a nice alternative to Wet n Wild's Petal Pusher.


Profusion Twinkle Twinkle 5 Color Eyeshadow Palette 02 Twinkle Twinkle 5 Color Eyeshadow Palette in 02
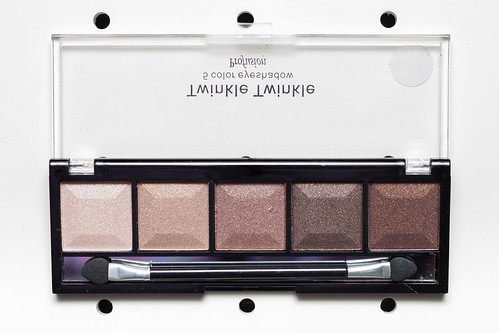
$1.00 | 8 grams
Available at Walgreens

Twinkle Twinkle 02 is a new all-shimmer, neutral-toned palette. Its quality is typical for $1 makeup, but primer does bring out the colors. The champagne shade is sheer and crumbly, as is the middle brown. The remaining shadows are soft to the touch and ever-so-slightly more pigmented. The standout color is also the most disappointing: the cool brown/burgundy with a gold glitter wash on the far right. It's incredibly dry and chalky, blends out to nothing, and has satin finish only if worn over primer.

Bottom Line: I'd recommend skipping need this one, especially if you're like me and already own tons of neutrals. Then again it's $1. Just expect a lot of glittery fallout.


Profusion Twinkle Twinkle 5 Color Eyeshadow Palette 03 Twinkle Twinkle 5 Color Eyeshadow Palette in 03
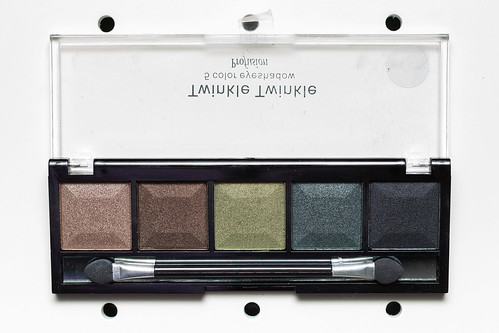
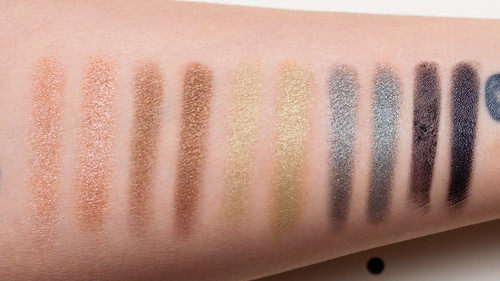
$1.00 | 8 grams
Available at Walgreens

Twinkle Twinkle 03 is a new all-shimmer, earth-toned palette. It instantly reminded me of Wet n Wild's Comfort Zone. All of the eyeshadows have great pigmentation and soft texture. Primer helps the gold in the middle green shade pop and gives the black something to adhere to as it's pretty crumbly without it. There's no real standout shade here, they're all great. The middle green also reminds me a little of Urban Decay's Mildew.

Bottom Line: Totally worthy of a dig through your couch cushions!


Overall: Some of the shades in the Twinkle Twinkle palettes are SO shimmery I'd say they're borderline frosts. I was very impressed with the performance, even with 02's shortcomings. It's up to you how you want to spend your dollars, but 01 and 03 are definitely winners.


When I picked up the Twinkle Twinkle palettes, I noticed there were quite a few other palettes on display along with all of the holiday bundles at Walgreens. One caught my eye because of its similarity to BH Cosmetics' Galaxy Chic Palette (you can see swatches here on Cait's blog), so of course I figured "why not?"

Profusion Angelic Eyes 10 Baked Shadows Palette Angelic Eyes 10 Baked Shadows Palette (Silver Packaging)
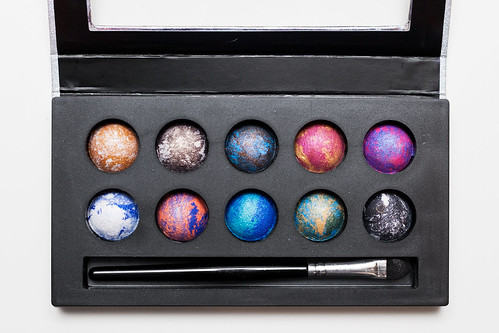
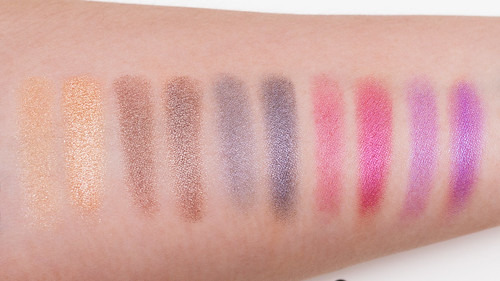
$5.00 | 13 grams
Available at Walgreens

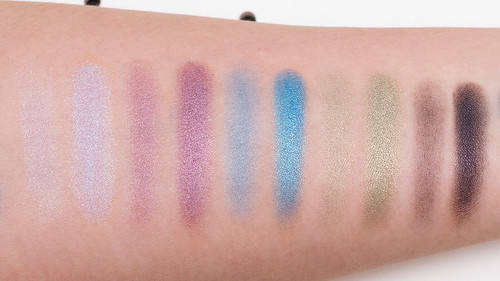
Angelic Eyes is a new colorful baked palette. It has ten beautiful marbled eyeshadows, all of which really shine over primer. They are very hit and miss without it. All are soft to the touch, and two crumbled easily beneath the pressure of my finger alone (photo here). Because they're baked they all have nice color shifts and really remind me of a few Urban Decay eyeshadows.

Bottom Line: It's a nice abbreviated alternative to BH Cosmetics' Galaxy Chic Palette which is normally $22.95 when it's not on sale (but it's never not on sale). Though I'm not in love with the palette, I do enjoy a few shades that I think compare to Urban Decay's Fishnet, Oil Slick, Haight, and Grifter somewhat in color—not quality.


So, what do you guys think? I'm alright with having spent $8 on Profusion Cosmetics, and maybe next time I won't be so quick to pass on the brand. As always, all images are clickable and lead to massive photos on flickr if you want to take a closer look!

11.12.2013

Oh, Vanity! Revamping My Makeup Storage

Well, would you look at that. I've finally come back to my ~DIY~ roots! By now you should know that I'm an obsessive planner and sometimes—actually, most times—I get ahead of myself and end up burned out before I've even gotten started. Another problem is, of course, wanting to do it allll.

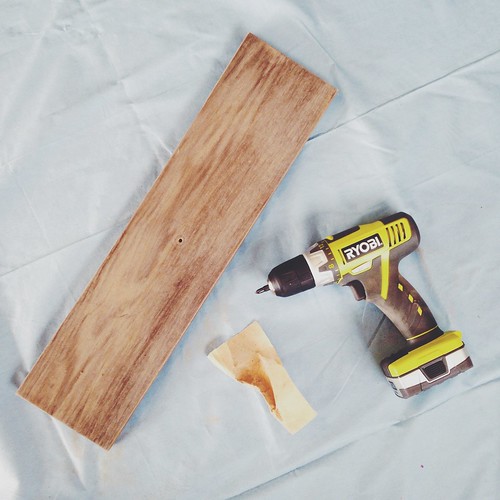
Sanded Wooden Drawer with Drill

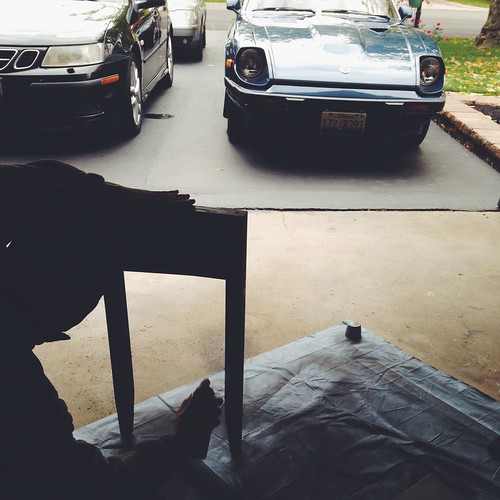
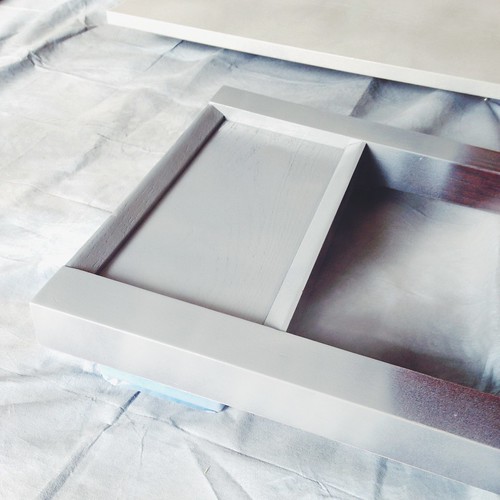
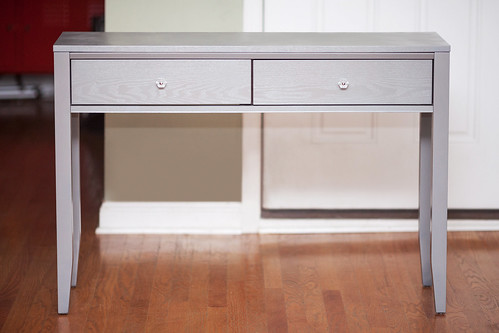
So, in the five whole minutes that we experienced fall in Chicago, I decided to give the desk I use as my vanity a little bit of a facelift. It was time; my mom bought it for my dorm almost a decade ago! Andrew and I disassembled and lugged it all the way out to the suburbs, then went in on it with spray paint in my in-laws' garage. After lots of legwork (armwork?) sanding and priming first.


Because my makeup collection had begun to overflow from my vanity, it was clearly the perfect time to embark on a project I first mentioned, oh, THREE YEARS AGO. The IKEA Fira mini chests I purchased way back when were intended for a different purpose, and though most were filled with craft supplies, two were completely empty and waiting to be used. It was destined to be!

photo

It's safe to say I completely underestimated how long this entire process would take. I was convinced we'd get the entire vanity painted and reassembled, plus the two chests put together and painted and back in the city in one Sunday. Ha! Keep a look out for part two of this post soon. In the meantime, isn't it awesome what a little spray paint can do? I absolutely love it!

11.06.2013

Disastrous Salted Caramel Brownies

First things first, that title is misleading. My first attempt at making brownies from scratch wasn't a total disaster, but the outcome wasn't very pretty either.

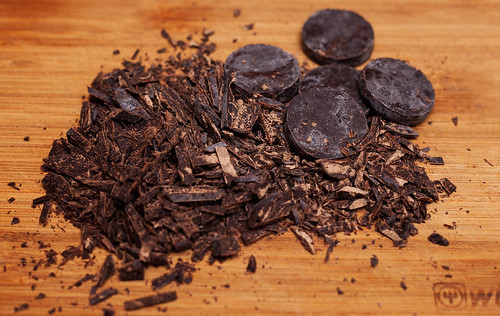
Chopped Tsokolate Chocolate for Salted Caramel Brownies

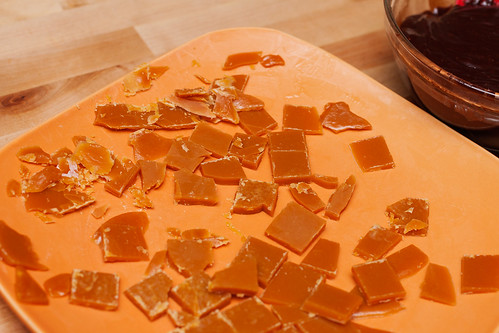
I should have known things were doomed when I pulled out what I thought was parchment paper only to see it was actually wax paper just as my caramel was ready to be poured. Of course! My panicked solution? Asking Andrew to butter a dish while holding the hot saucepan in one hand and my face in the other. Cutting the caramel into perfect little squares after it cooled clearly wasn't going to happen but I was relieved to have (semi) successfully made caramel for wannabe caramel candies.

Salted Caramel on the stove for Salted Caramel Brownies Salted Caramel pieces cooled for Salted Caramel Brownies

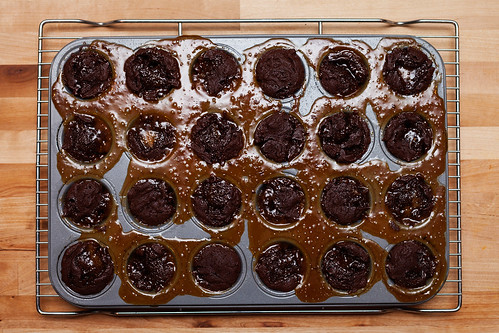
Using Smitten Kitchen's Salted Caramel Brownies recipe, I upped the salt content, but only by a pinch or two, to cut some of the inevitable sweetness. Everything would have been fine from here had I employed some common sense; ergo, caramel melts → mini-muffin pans are shallow → don't fill the pan so damn high.

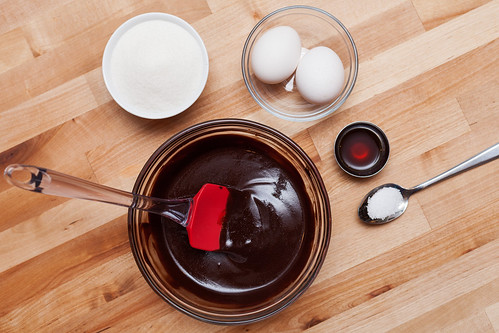
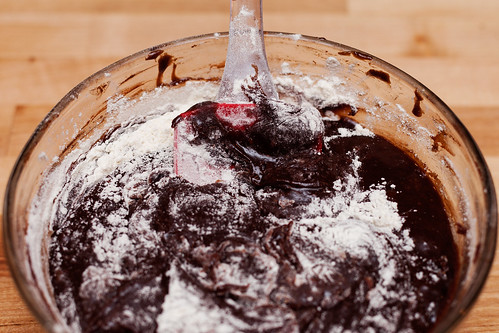
Ingredients for Salted Caramel Brownie Batter Brownie Batter for Salted Caramel Brownies

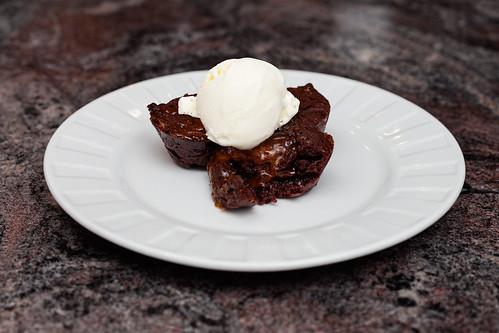
Each bite had the perfect balance of sticky, salty-sweet caramel and rich, dark chocolate goodness. I mean, they were mouthwatering. I honestly could have eaten the entire batch in one sitting if they weren't headed to my in-laws as Sunday dinner's dessert. I served them warmed and topped with vanilla custard. SO, so good. I will definitely make these brownies again, being sure to forgo the mini-muffin pan. Having all-edge pieces was a delicious result, but I think a square pan is ideal.

Salted Caramel Brownies topped with Vanilla Custard

I debated having an entire post dedicated to these Salted Caramel Brownies but I think it's important to showcase your (my) failures and laugh at yourself (myself). Don't you? Obviously everything I make in my kitchen isn't a masterpiece (I wish!) and some things can be so painfully simple, I'll think "why am I putting so much effort into styling this food right now?" Yet here I am.

Things could have gotten way worse. I could have set off all the smoke detectors from the dripping caramel oozing off of the mini-muffin pan onto the bottom of the oven, the dripping caramel causing the apartment to go up in flames—is that even possible? Or I could have sliced a few fingers off while improperly holding my chef's knife chopping chocolate intended for Tsokolate (Filipino hot chocolate)!

Baked Salted Caramel Brownies

Now I'm thinking I could have gotten away with no one knowing about this, besides Andrew, if it weren't for this post... What's the worst damage you've caused in the kitchen? How did you recover?

10.31.2013

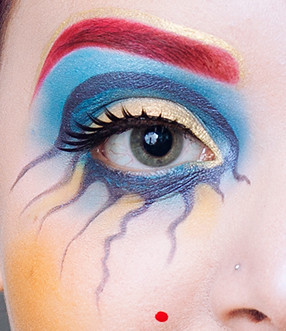
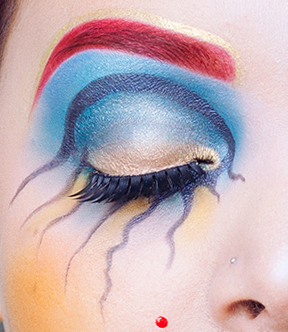
Illamasqua Inspired Halloween

Illamasqua's Creative Director, Alex Box, is an amazingly talented, constant makeup inspiration. The looks she creates with each collection the London-based brand launches leave me in awe (and wishing I had excuses to go all out all of the time). Naturally, I had to recreate one of her looks for a special Halloween Get the Look!

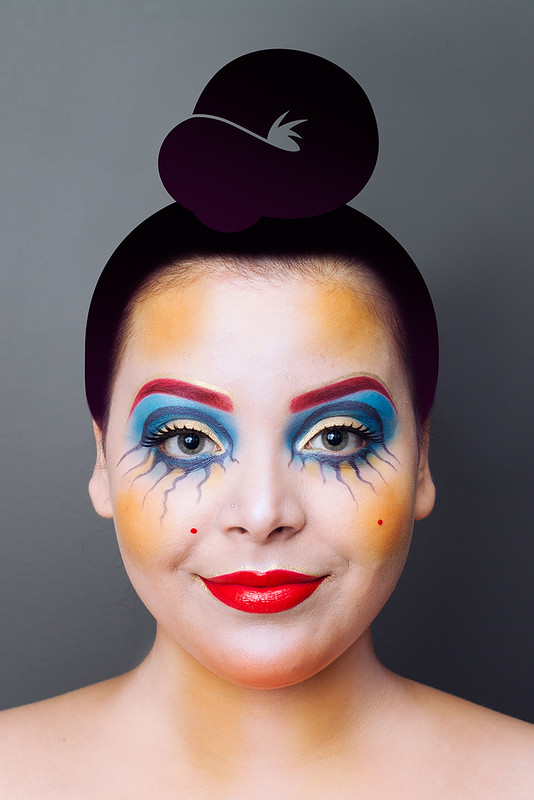
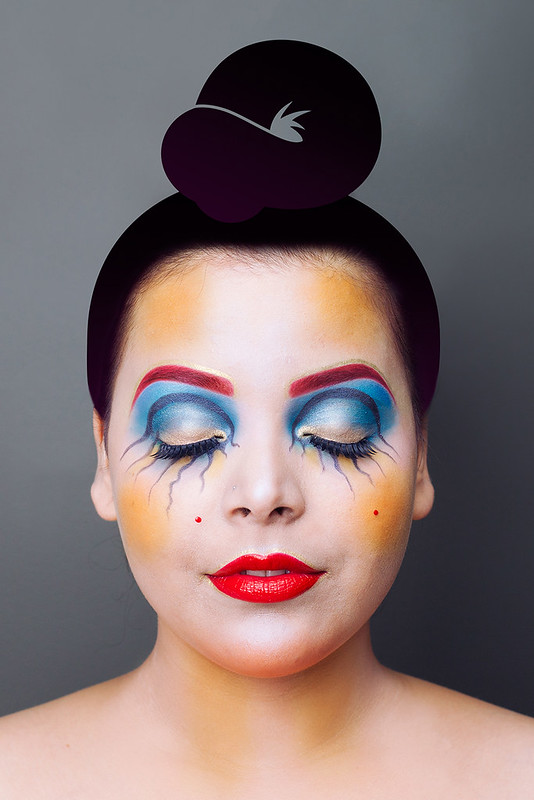
Halloween Get the Look makeup tutorial inspired by Illamasqua - Eyes Open Halloween Get the Look makeup tutorial inspired by Illamasqua - Eyes Closed
Halloween Get the Look makeup tutorial inspired by Illamasqua - eye open Halloween Get the Look makeup tutorial inspired by Illamasqua - eye closed

Illamasqua is one brand I have super limited experience with. In fact, I only own two of their lipsticks but I'm dying to try out more. For this look, I'm wearing Rimmel Show Off Lip Lacquer in Big Bang, with gold eyeshadow pigment (Gold Finger) along the outside of my upper lip and outer edges of my bottom lip.

Products Used:
NYX Eyeshadow Base in White
Maybelline Color Tattoo in Tenacious Teal
ULTA Eyeshadow in Mosaic and Chianti
Random Blue Eyeshadow??
MAC Eyeshadow in Chrome Yellow and Orange
EMANI Crushed Minerals Color Dust in Gold Finger
Prestige Beauty Bar Eyeshadow Palette in Artsy Tartsy
NYX Lipliner Pencil in Plush Red
Covergirl Clump Crusher Mascara
Ardell Special Occasion Collection in Sublime

Halloween Get the Look makeup tutorial inspired by Illamasqua - Products Used

Before you even get to the eyes, apply white face paint, or in my case, the lightest foundation available at Walgreens. Set with translucent powder, and highlight nose, cupid's bow, forehead, etc. with iridescent white pigment. Mix yellow and orange eyeshadow to create mustard and apply to cheeks, temples, chin, and hollows of neck. Add a touch of blush to your chin, too!

Halloween Get the Look makeup tutorial inspired by Illamasqua
Step 1: Outline eyebrows with red lip liner (Plush Red), blend and fill.
Step 2: Set eyebrows with red eyeshadow (Chianti).
Step 3: Pat blue base (Tenacious Teal) over entire eye area, omitting eyelid.
Step 4: Apply blue over entire eye area with a fluffy brush, omitting inner eyelid.
Step 5: Apply blue to lower lash line with a pencil brush.
Step 6: Apply gold (Gold Finger) onto eyelid with an eyeshadow brush.
Step 7: Apply dark blue wet to create a false crease using a detailing brush.
Step 8: Bring dark blue down and around tear duct, and line lower lash line.
Step 9: Create squiggly lines extending from lower lash line using dark blue wet.
Step 10: Wipe away every other gap (2nd, 4th, 6th) using a makeup remover + q-tip.
Step 11: Fill in gaps (2nd, 4th, 6th) with yellow (Chrome Yellow).
Step 12: Apply light blue (Mosaic) as highlight to brow bone.
Step 13: Apply gold (Gold Finger) above eyebrow using a detailing brush.
Step 14: Apply gold (Gold Finger) to tear duct.
Step 15: Apply false lashes!

I hope you enjoyed this Illamasquaesque look! It was so much fun to do, even though those Ardell lashes were a total pain to apply (they're so stiff). Let me know what awesome things you're doing today, and what you're dressing as! Happy Halloween!